Ricoh Quick Guide: Designate a Cover Sheet
- Select File
- Select Print
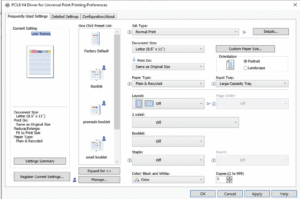
- Select Properties
- First, you want to set up the main part of the job that will reside behind the cover page.
- Select the Tray you wish to pull the paper from for this part of the document (Ex. Tray 1, Large Capacity…etc.)

- Now, we will set up the Cover Sheet
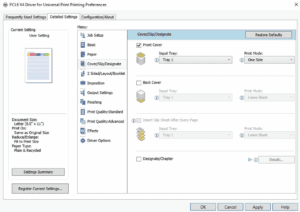
- Select the Detailed Settings Tab at the top of the window
- Select Cover/Slip/Designate
- Place a check mark next to the Cover sheet
- Select the Tray you will be pulling the cover from (ex. Tray 1, bypass tray…etc.)
- Select if you want it to be left blank, printed on one side, or printed on both sides

- Make any further setting changes
- Select OK
- Select Print
